

Sharing data across different organizations, accounts, and regions used to be hard…but Vendia Share Universal Apps (Unis) make it easy! Vendia’s unique architecture offers a distributed data model that goes everywhere you need. However, sometimes the data to be shared is larger or more complex than just numbers and strings.
What if you need to share parquet files, multimedia images, or PDFs? Vendia Share has you covered with its Files feature, which lets you share large objects with other participants (Nodes) in your Uni the same way you share scalar data. Like a file system, you can also control which other participants can read (download) and write (delete or modify) the files you own.
This step-by-step example of how Files can be shared in Unis demonstrates that you can share files with other participants in a Uni while controlling read and write permissions.
File sharing example
To start sharing files, you’ll need to create a Uni, and you’ll need a new or existing Amazon S3 bucket to use as a data source. We’ll walk through the details of accomplishing both of these tasks. Once these prerequisites are completed, we’ll provide examples of creating and sharing files and updating the permissions on those files to control access by other participants.
Create a Uni
To get started, create a Uni with two nodes. You can do that through the Vendia Share API, the share command line, or through Vendia Share’s Web UI. The Web UI makes creating a Uni easy, so we’ll illustrate that approach below. For more detailed steps (and more options) when creating a Uni, explore our Quickstart guides.
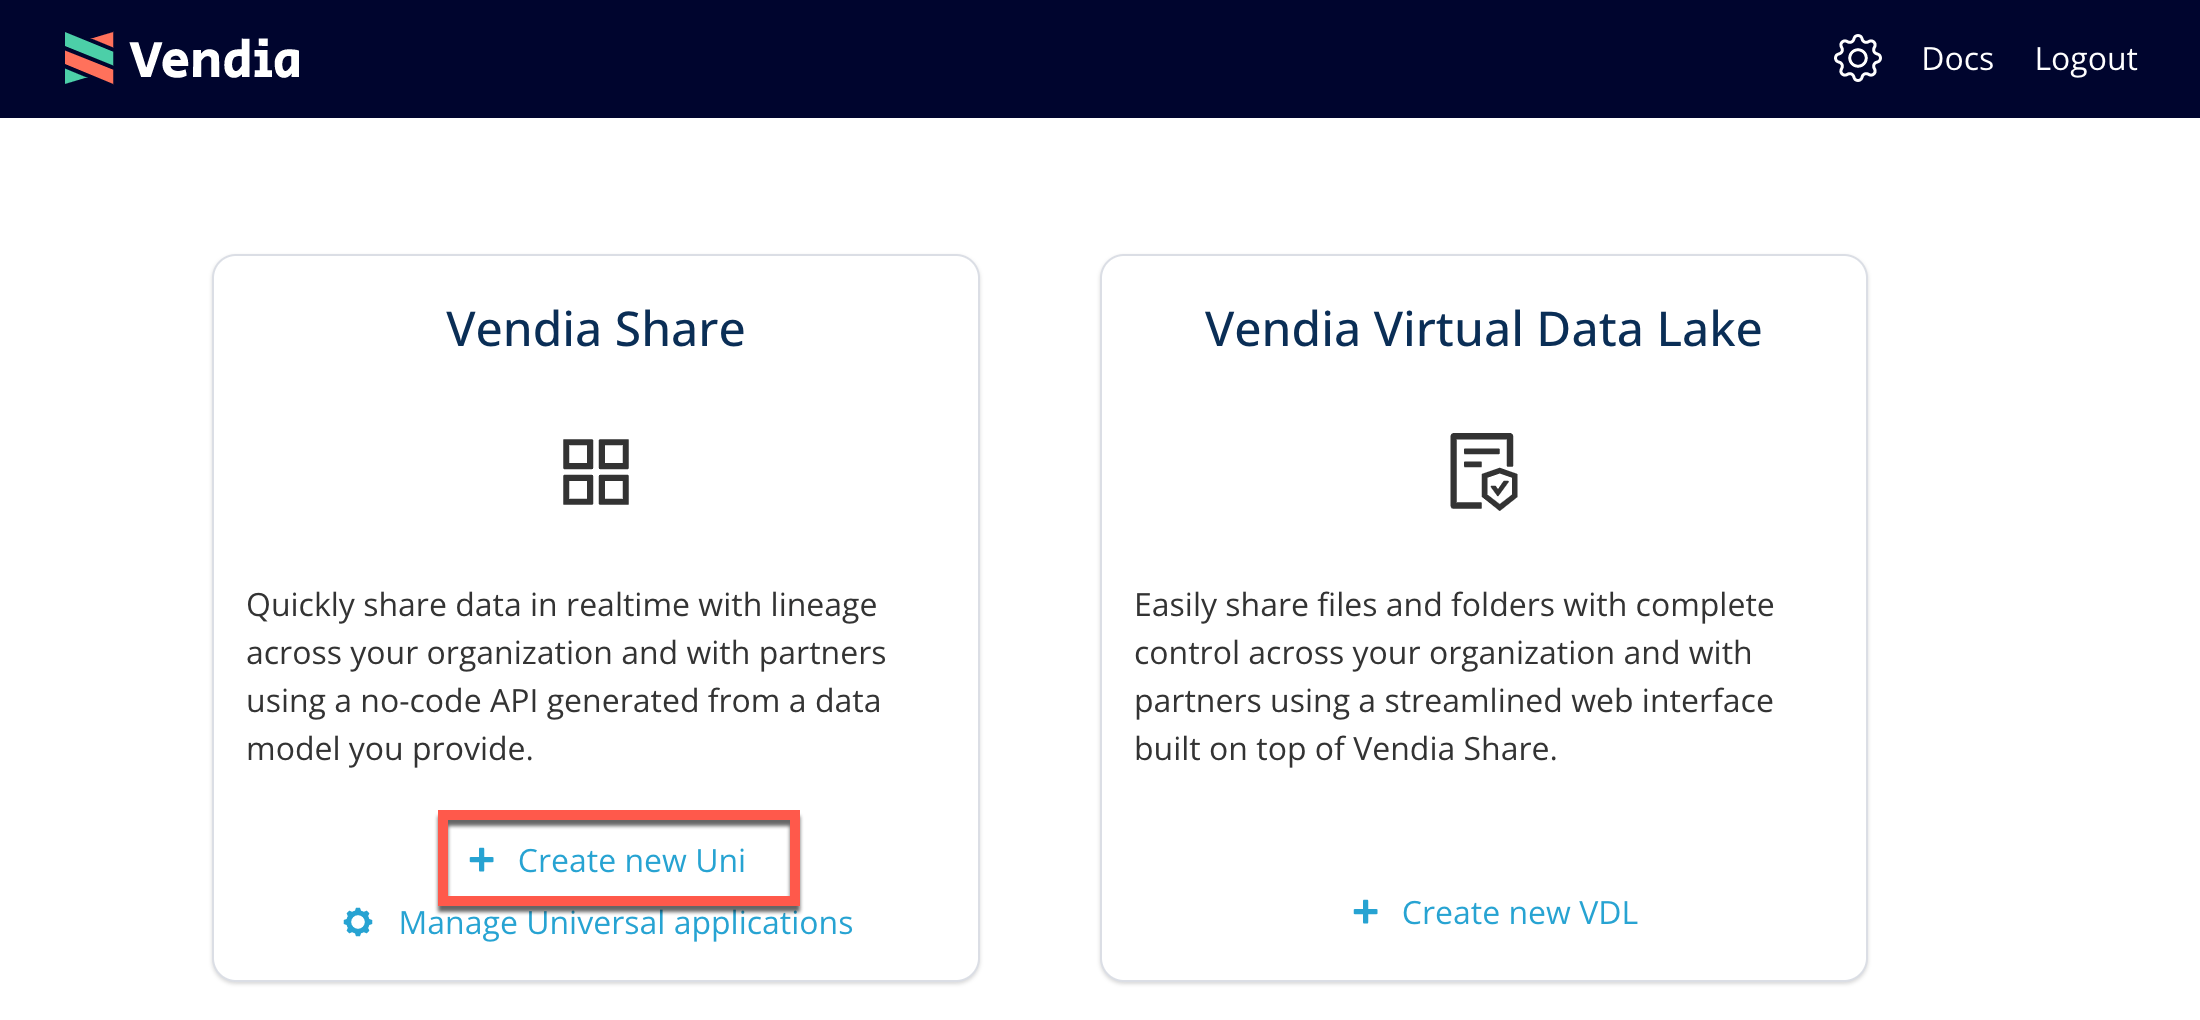
Clicking the Create a new Uni link allows you to configure the details of your new Uni prior to construction.
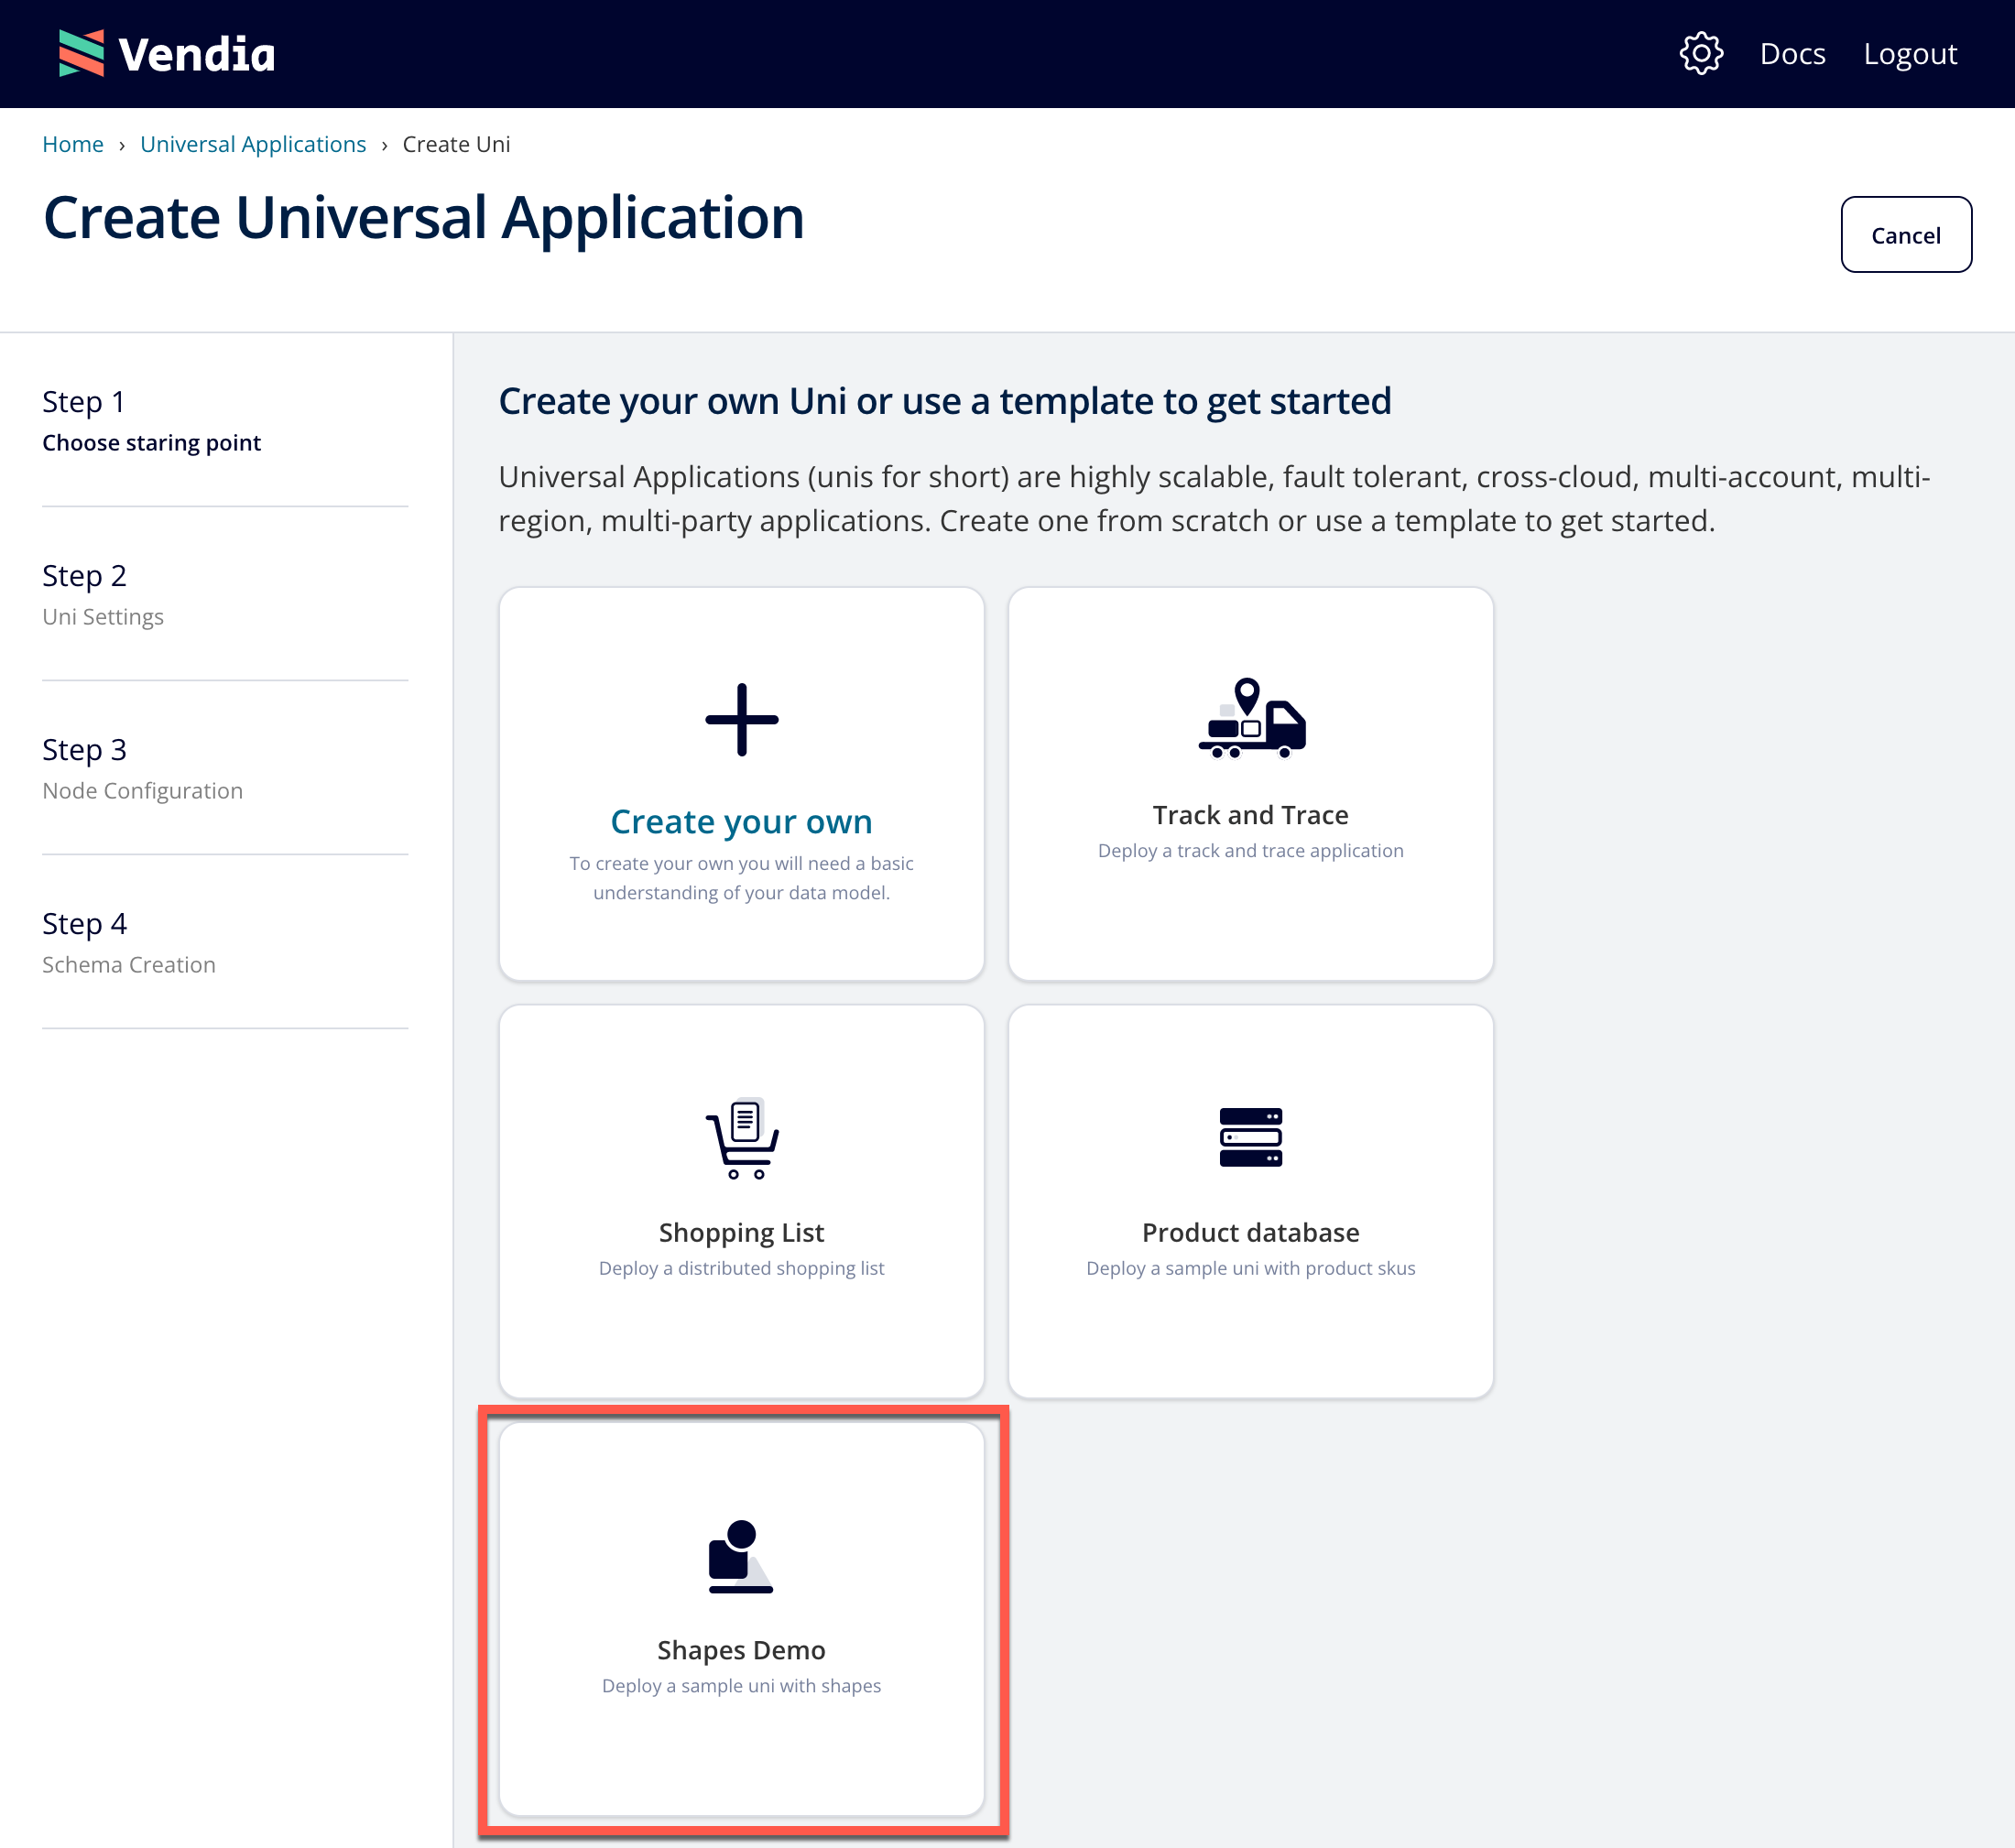
The Create Universal Application screen allows you to create your own Uni based on your own data model or use one of several templates to get started.
For our example, we will use the Shapes Demo.
Node Config
For this example, we need to create a two node Uni so we can see the effects of sharing and adjusting permissions on files. We will use the Uni name test-sharing-files. Please choose a unique name that begins with test-. Use the example Node Configuration below. You can leave the regions as is or adjust them to be any of the Share-supported regions.
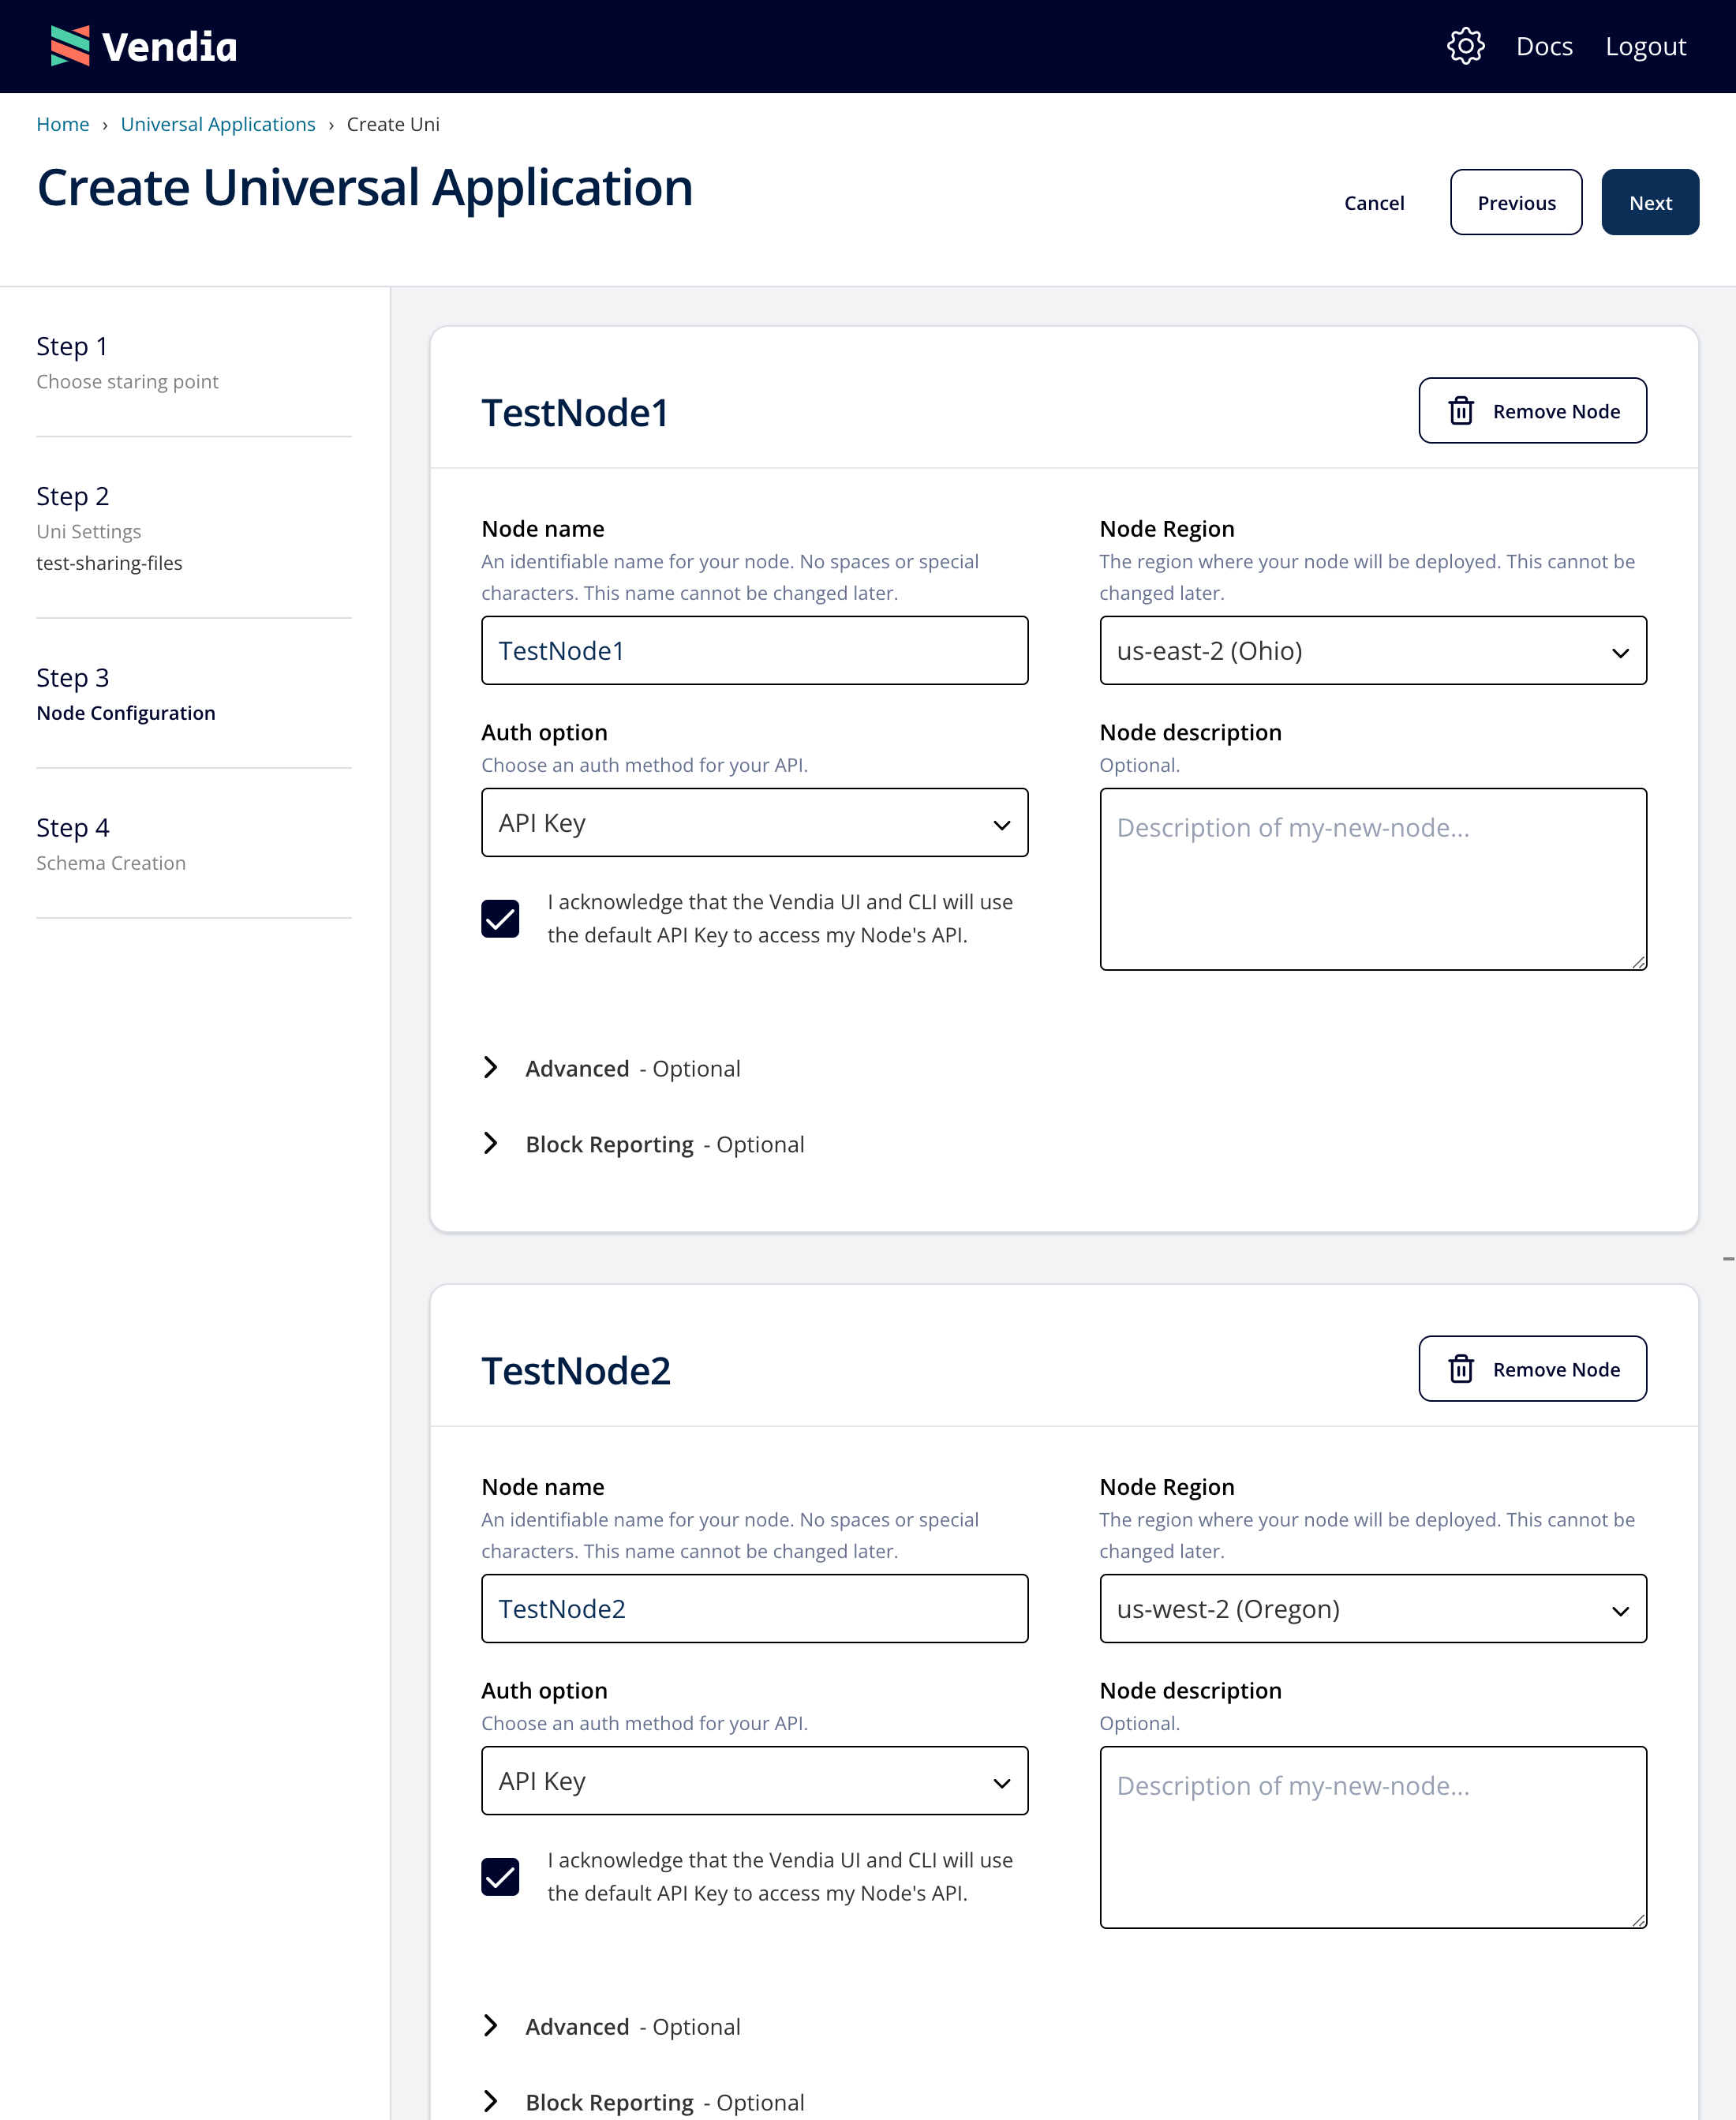
(Of course you can create Unis with many more nodes, but for purposes of this file example, two are sufficient.)
Uni Schema and Initial State
You can use the default schema and initial state.
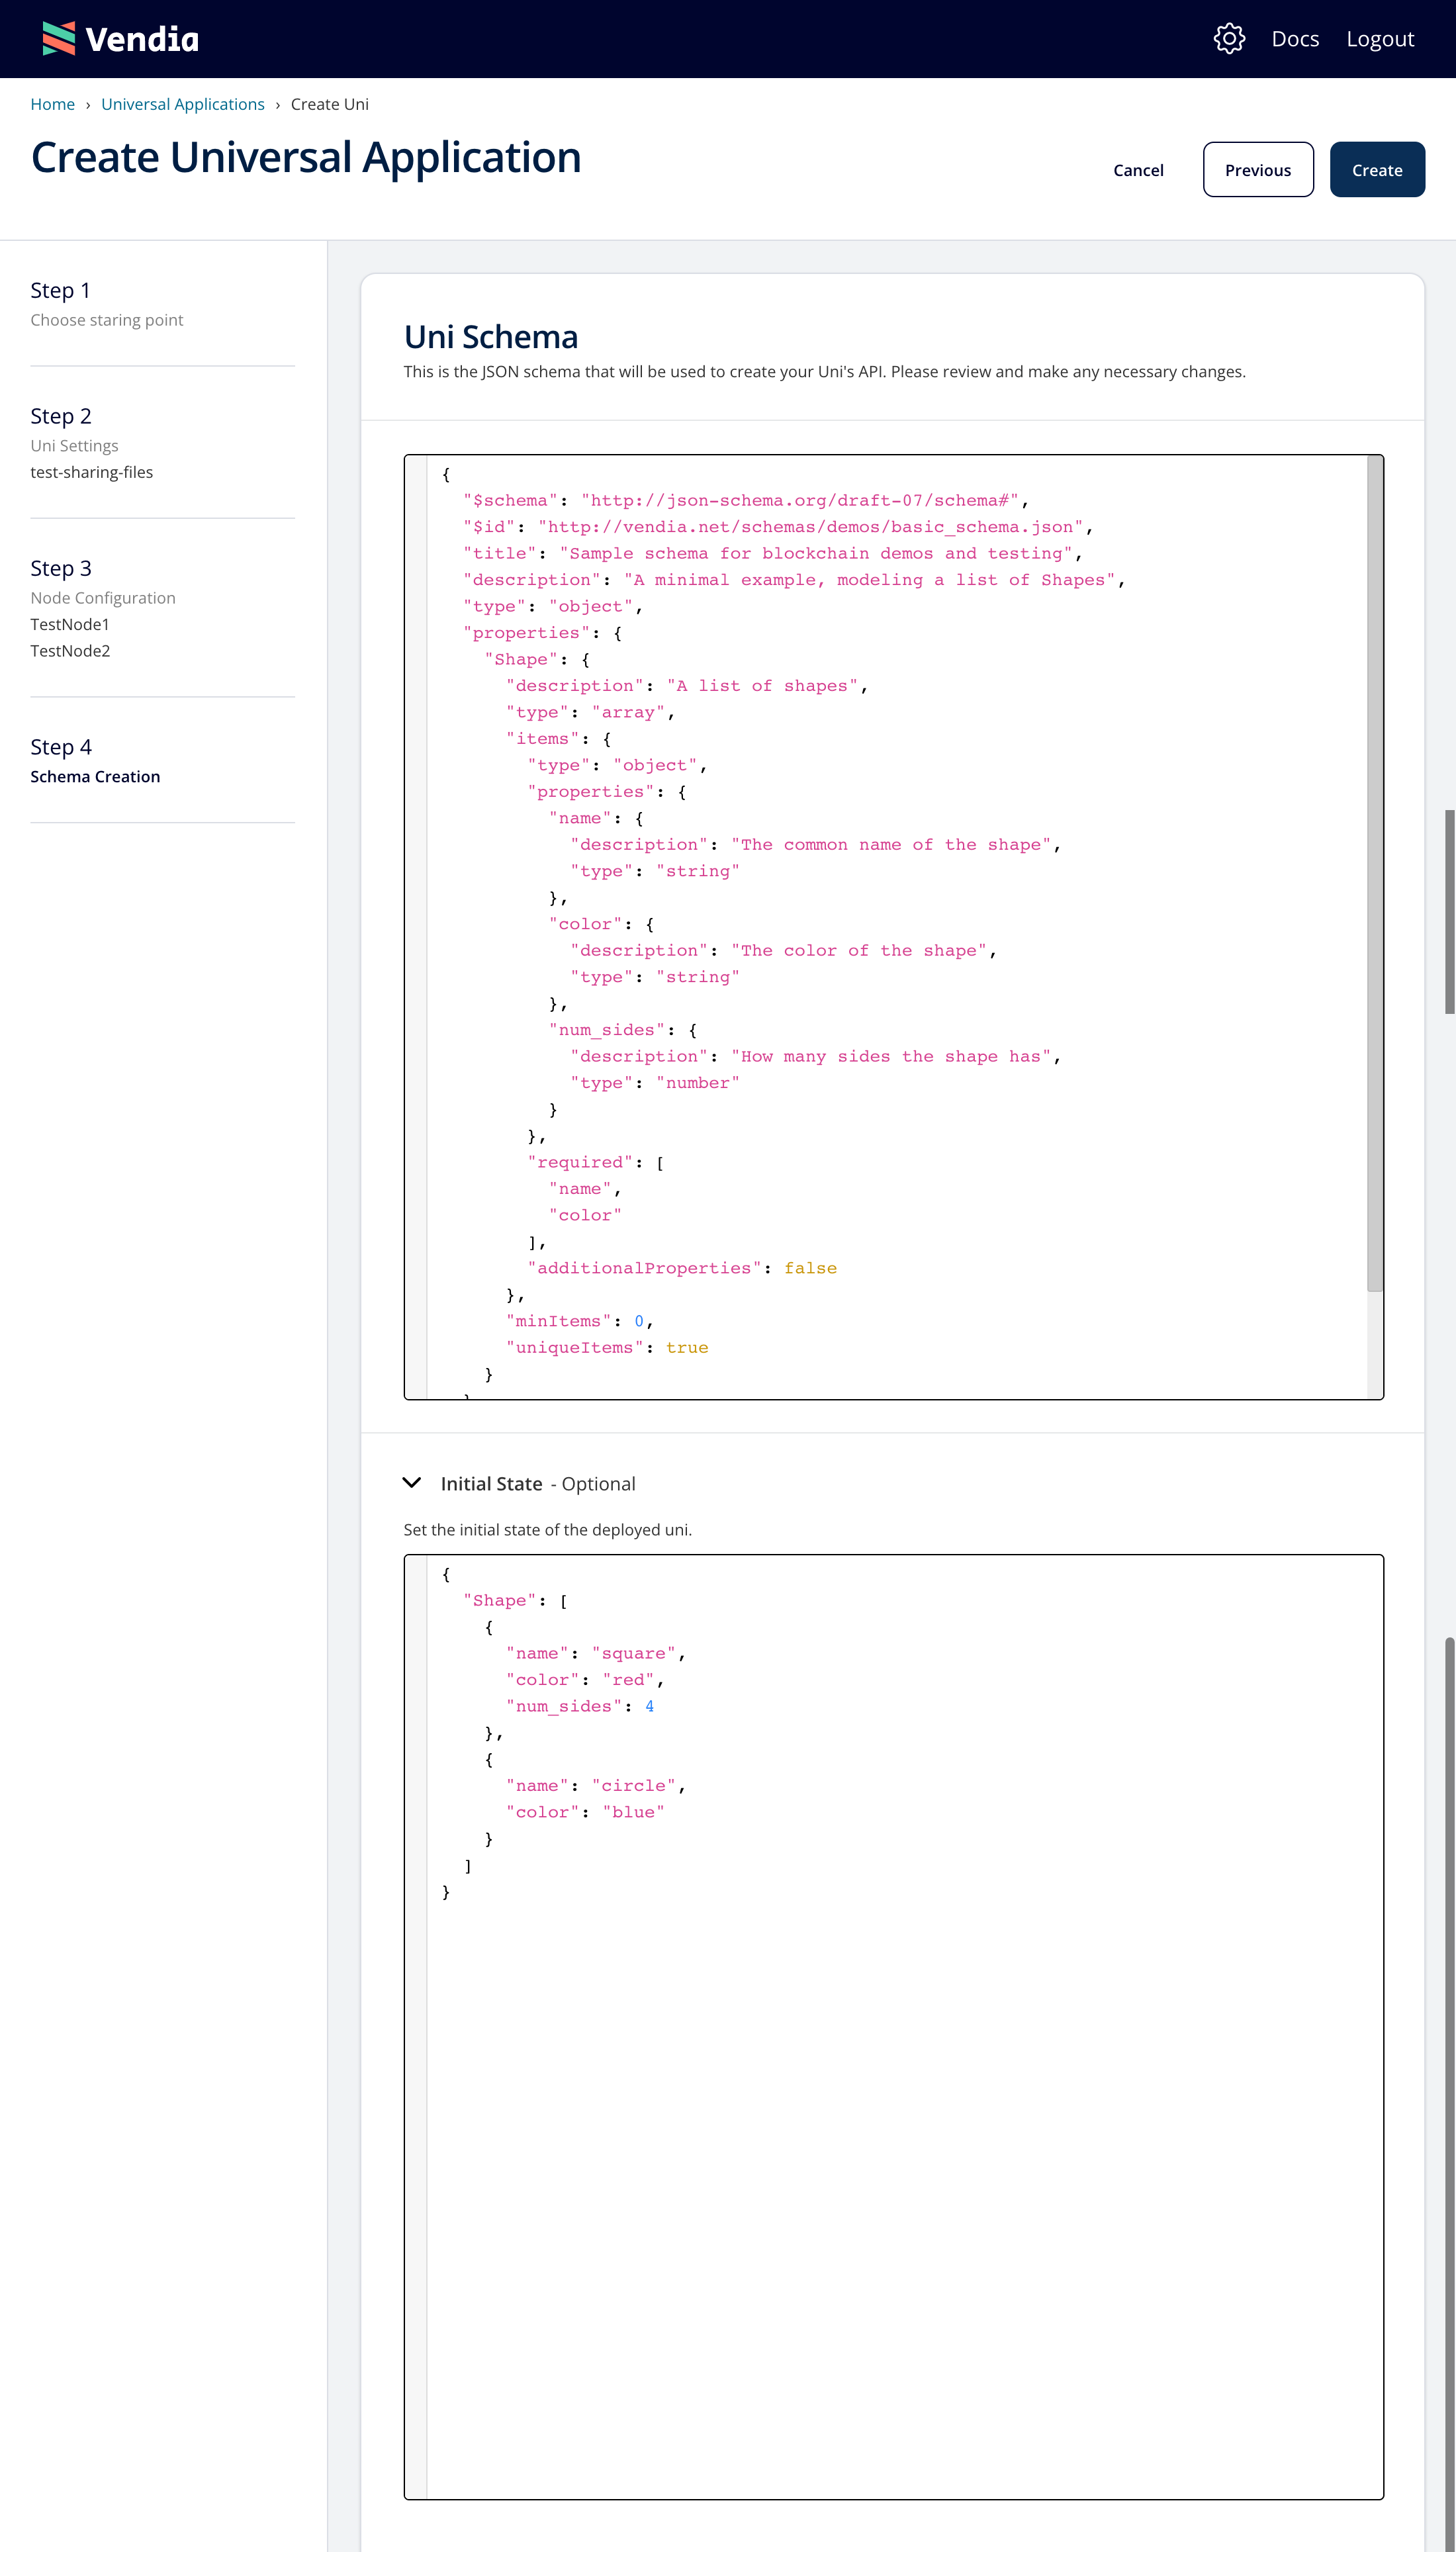
Press the Create button.
Setup an external S3 Bucket
While we wait for the Uni to spin up (approximately 5 minutes) we can proceed with making an Amazon S3 bucket available to your Uni. While there are multiple ways to upload files to your uni, in this example we’ll create some sample files in your personal bucket and then transfer them from there to the Uni. Follow the detailed instructions here to set up permissions to allow files to be exchanged between your S3 bucket and your Uni node. These instructions assume that you already have an AWS account with an S3 bucket created; check out AWS’s documentation if you need more guidance on S3 setup.
Add a File with “All Uni” access
Now that your Uni is up and you’ve connected your personal S3 bucket, we can start adding and sharing files. Let’s begin by copying a file from your S3 bucket to your node (which will then copy it to all other nodes as part of the uni’s built-in consensus and replication process). We’ll make this file visible to all nodes in your Uni.
Step 1: Add a File to S3
Upload a File into your personal S3 bucket and name it test.txt.
Step 2: Start the Uni’s GraphQL Explorer
Open up the GraphQL Explorer for “Node 1” in your Uni via the Share Web UI:

Step 3: Execute the AddFile mutation
File operations are built into Vendia Share – no matter what your schema model looks like you have the ability to work with them. To copy a file from your S3 bucket to the uni, paste in the mutation below to the GraphQL explorer and execute it, being sure to replace the parameters with your actual file information: your S3 bucket name, the AWS region your bucket is in, and the name of the file to copy. (Note that S3 refers to the full name of a file as a “key”.) Be sure to use the official AWS region names for SourceRegion – typically, this will be the same region in which your node resides.
mutation AddFile {
  addVendia_File(
    input: {
      sourceBucket: "<YOUR S3 BUCKET NAME HERE>",
      sourceKey: "<OBJECT NAME FROM YOUR S3 BUCKET>",
      sourceRegion: "<REGION OF YOUR S3 BUCKET>",
      destinationKey: "my-first-file.txt"
    }
  ) {
  transaction {
      transactionId
    }
  }
}
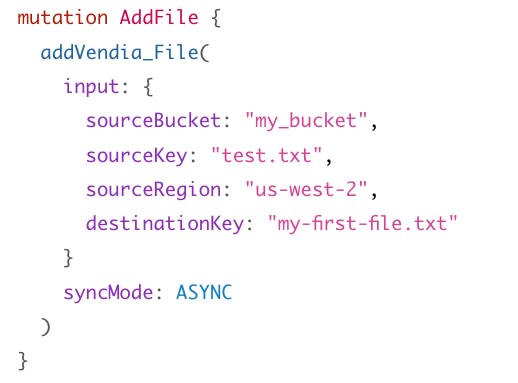
Your mutation will look something like this once the arguments are properly filled in:
After your AddFile mutation executes, the new file will be visible to all nodes in the Uni. You can see it in your original node by running the following query:
query ListAllFiles {
  listVendia_FileItems {
    Vendia_FileItems {
      _id
      destinationKey
      etag
    }
  }
}
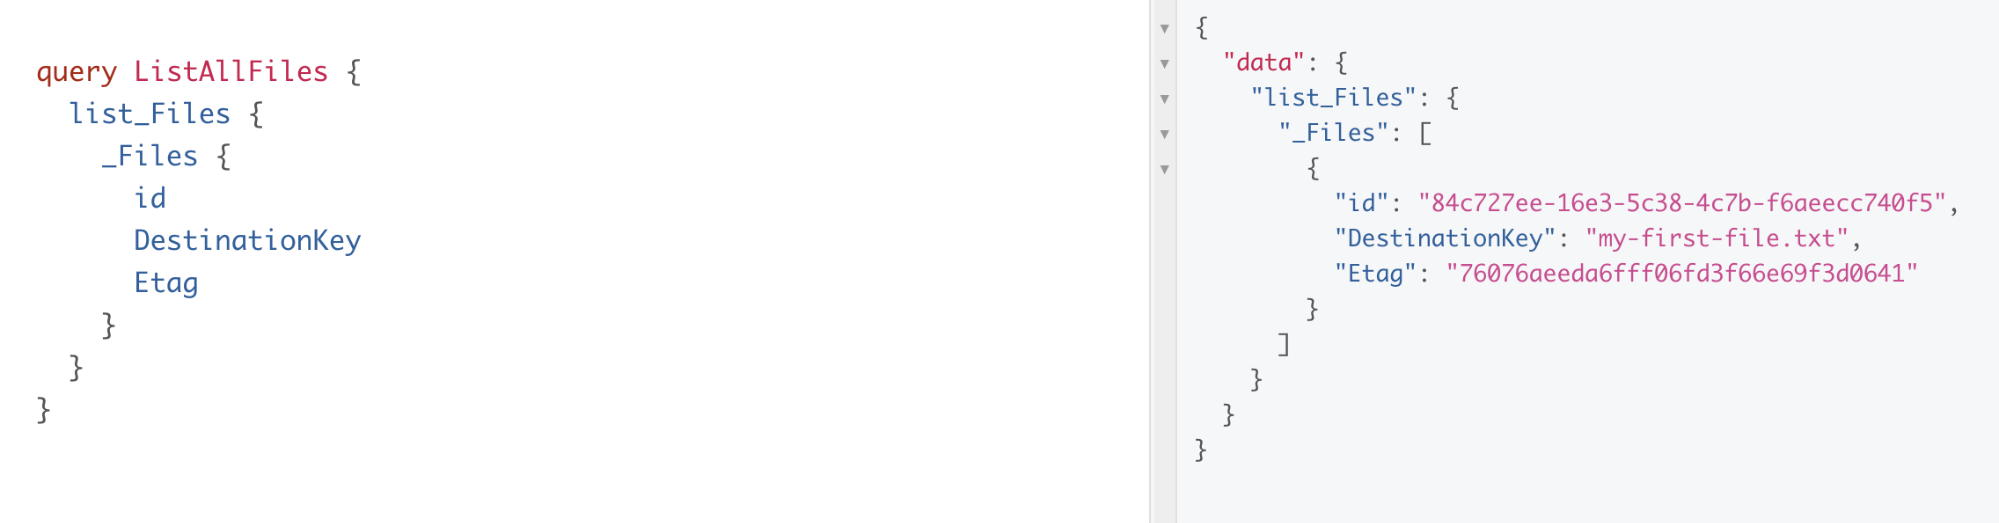
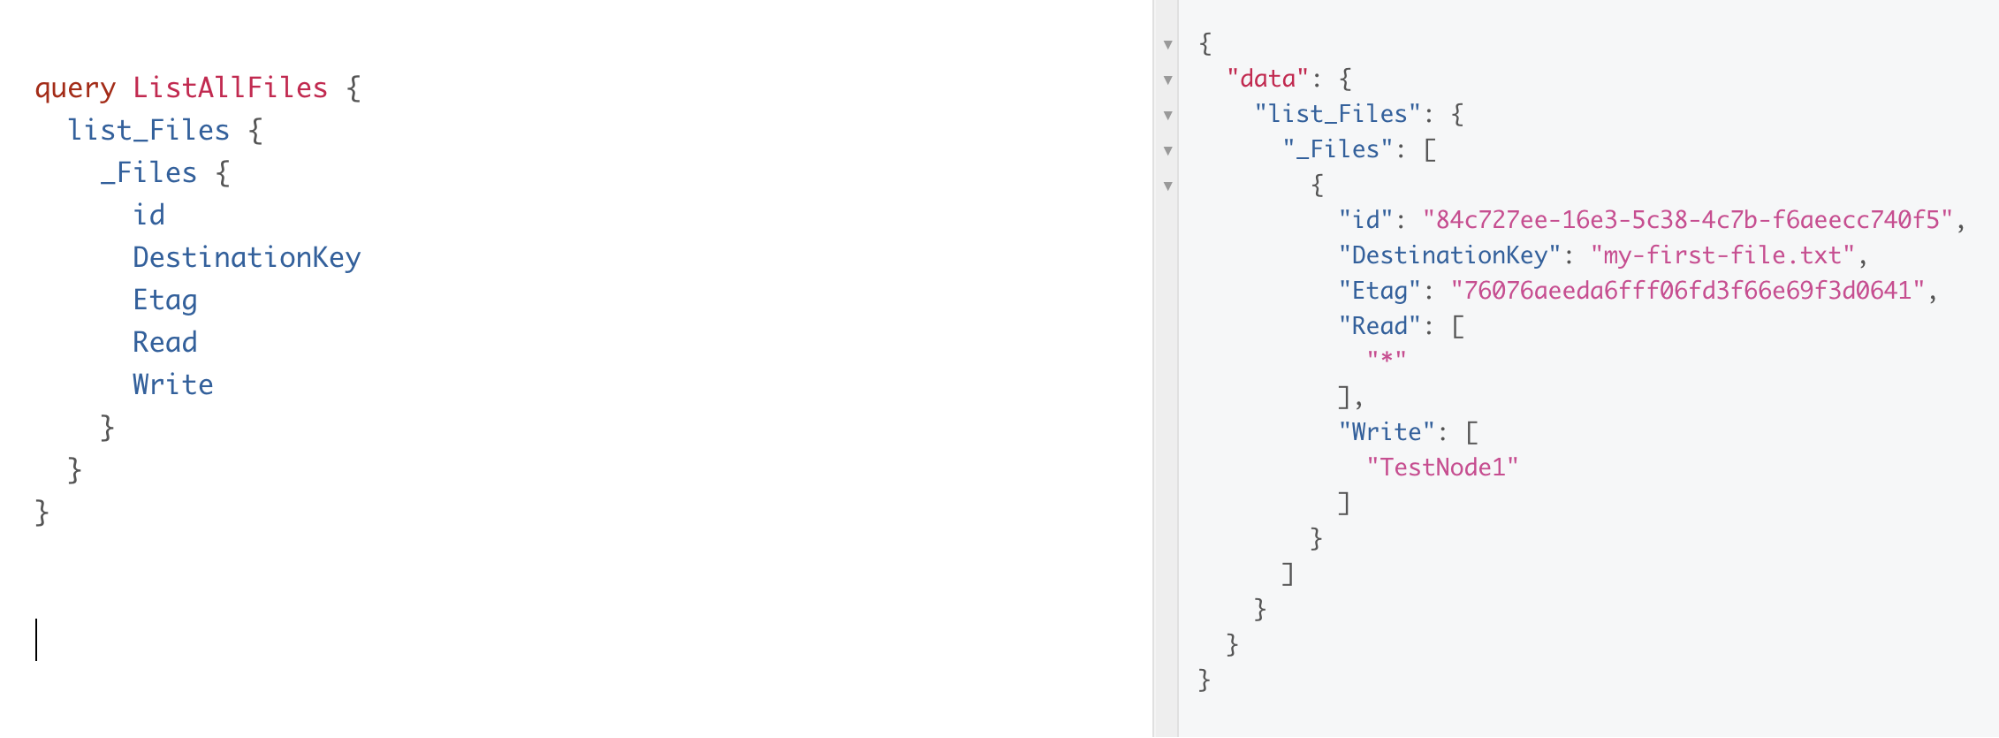
The resulting output will show your file my-first-file.txt, and look similar to this:
You can bring up a GraphQL explorer for the other node in your Uni and you will see this same output. This is because when you added the file you were using the default settings: By default, all nodes have read access to the file but only the file’s owner (the node that uploaded it originally) has permission to modify it. If we extend the ListAllFiles mutation to include the Read and Write properties we can see this explicitly: Run the follow query in one of your Uni’s Nodes:
query ListAllFiles {
  listVendia_FileItems {
    Vendia_FileItems {
      _id
      destinationKey
      etag
      read
      write
    }
  }
}
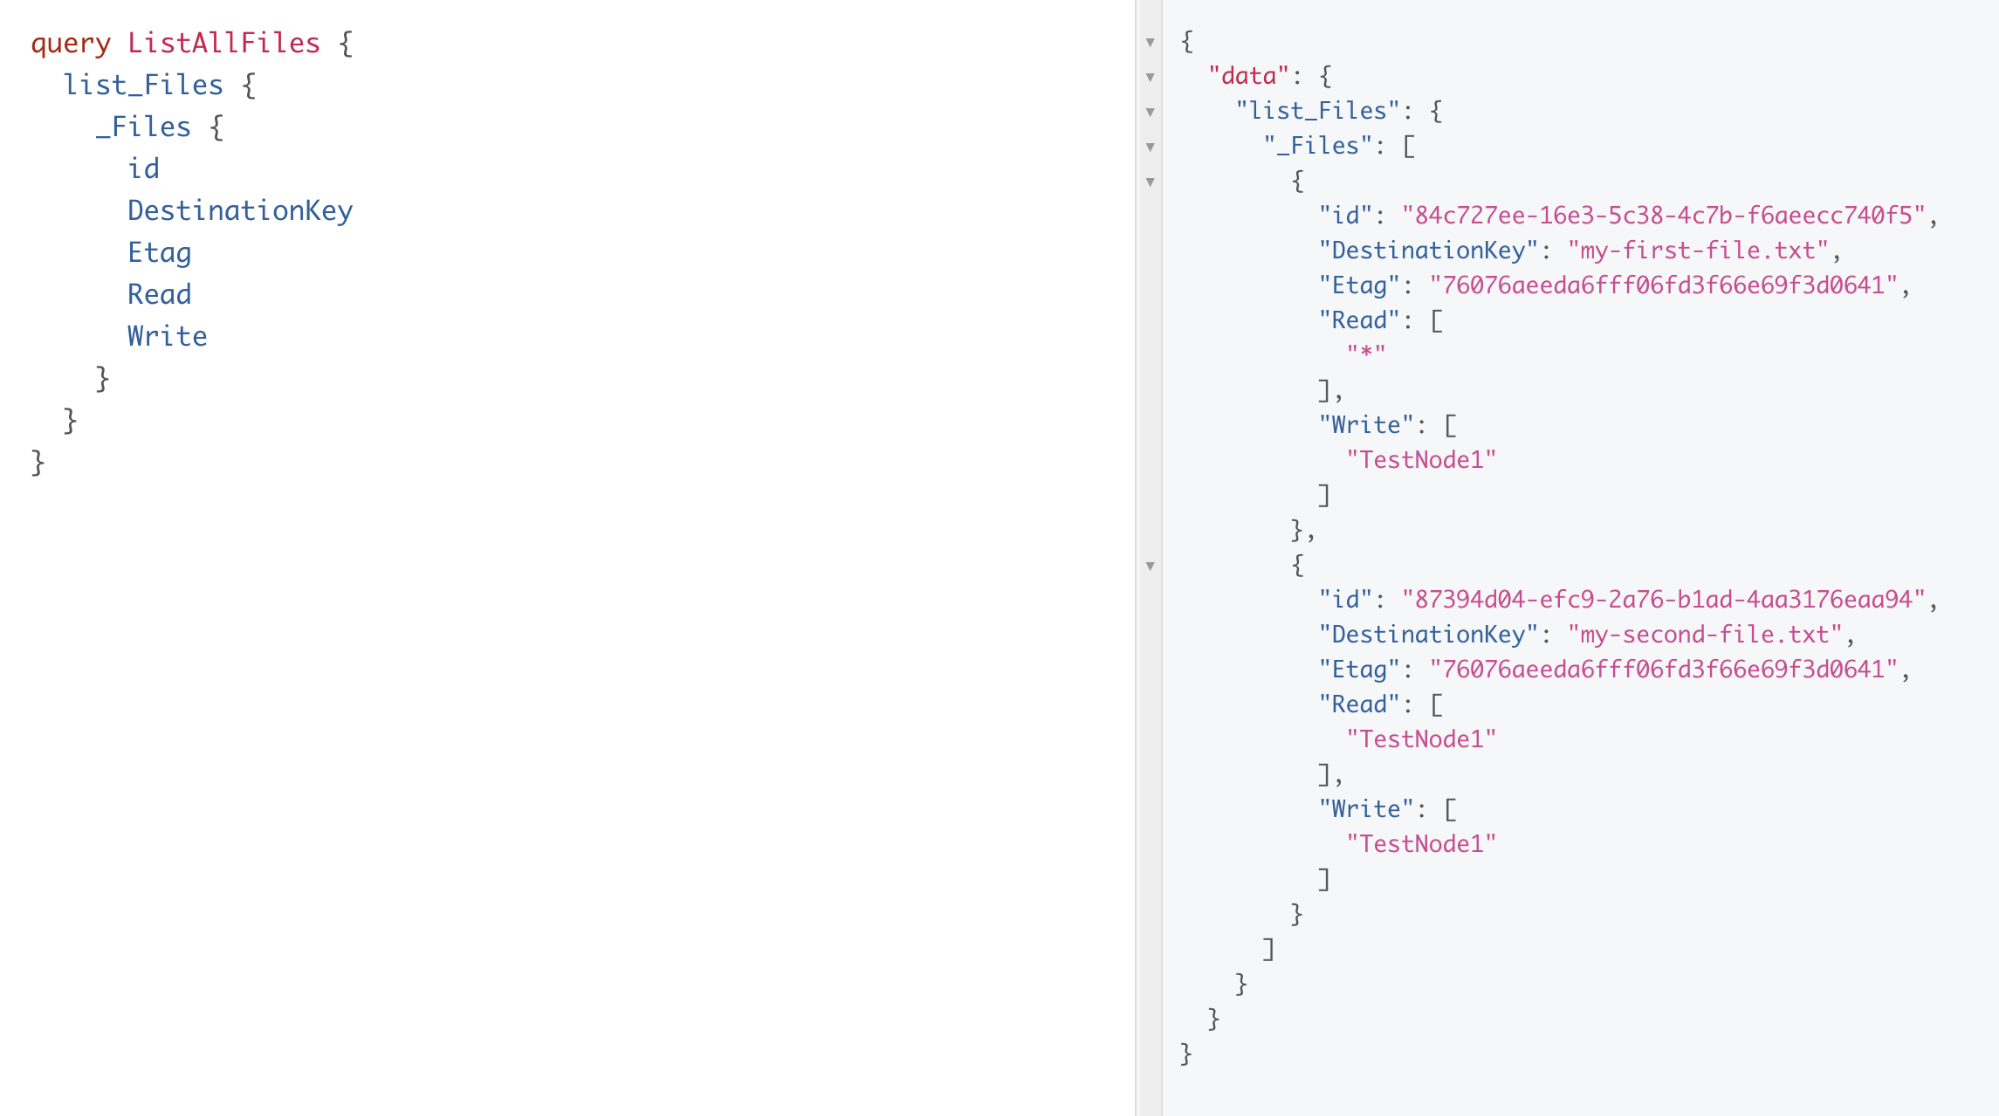
You should see the following output:
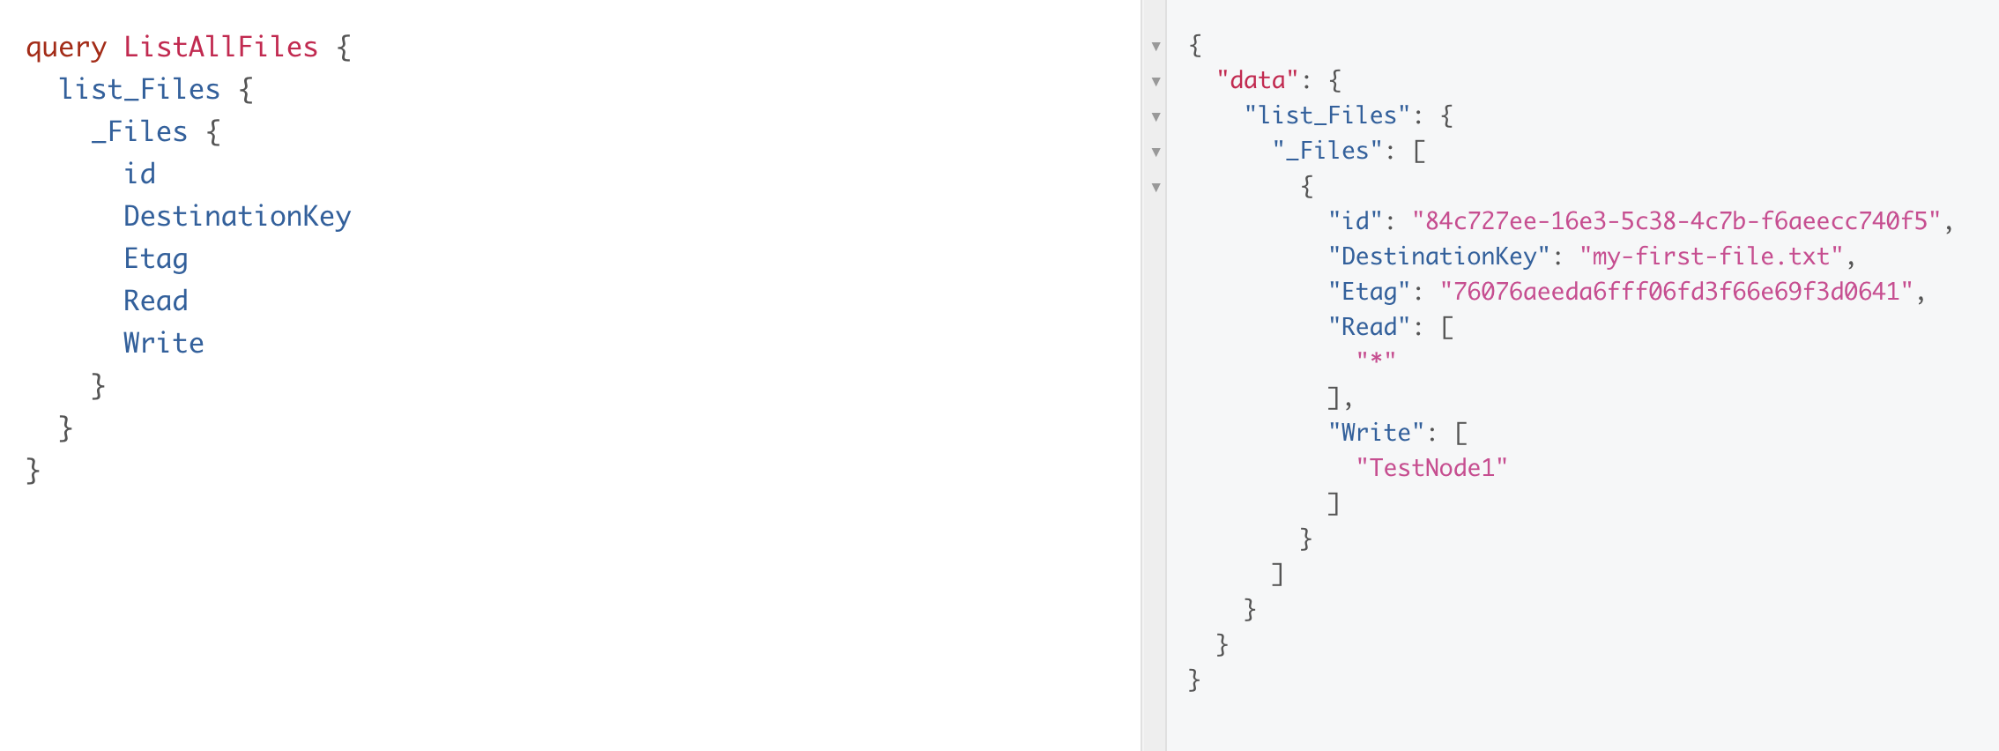
Notice that the Read setting is “*”, which means that all nodes in the Uni have the ability to read the file. However, the Write permission only lists “TestNode1” – only that node (the file’s owner) can update or remove this file.
Further, notice that all Nodes have the same id, DestinationKey, and Etag values. An identical Etag verifies that the content of the file in each node is the same. (This information is also used in the creation of a replicated, immutable ledger to prove that all nodes share the same file content whenever a file is created or modified.)
Now, let’s make sure permissions work. Let’s verify that Node 2 cannot update the file, by attempting to run this mutation in Node 2:
mutation UpdateFile {
  updateVendia_File(id: "",
    input: {
      sourceBucket: "",
      sourceKey: "",
      sourceRegion: "",
      destinationKey: ""
    }
  ) {
  transaction {
      transactionId
    }
  }
}
Running the update mutation above in Node 2 will result in the following output:
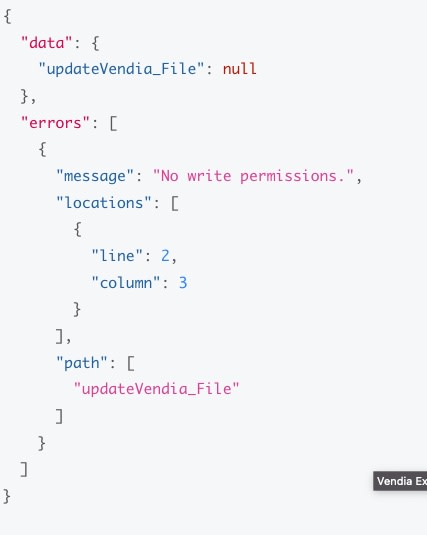
That’s as it should be — the error matches our expectation that Node 2 isn’t allowed to modify this file.
Restricting read access to a File
When adding a file, we could also choose to restrict the set of nodes with read access to the file by explicitly setting its Read property. Let’s see that in action: In Node 1’s GraphQL Explorer, execute the following mutation (again, being sure to adjust it for your own bucket):
mutation AddFile2 {
  addVendia_File(
    input: {
      sourceBucket: "my_bucket",
      sourceKey: "test.txt",
      sourceRegion: "us-west-2",
      destinationKey: "my-second-file.txt",
      read: ["TestNode1"]
    }
  ){
  transaction {
      transactionId
    }
  }
}
Now if you list the files in each node, you’ll notice that my-second-file.txt is only present in Node 1.
Here’s the output you will see in Node1 versus the output of Node2.
In Node1 you’ll see:
Whereas in Node2 you’ll see:
That may not seem very exciting, but in a Uni with more nodes modeling complex business or application relationships, you can see how the ability to restrict access at the level of individual files can be important…and how easy it is!
Allowing all Nodes to Update a File
We can also use the same approach to control who can update a file. By explicitly setting the Write property on a file, we can give a select set of nodes the ability to alter its content. The following example allows all nodes to modify a file by using the special node name, “*”. It has the meaning of “all the nodes in the Uni, including any new ones that are added later on.”
Execute the following mutation to add a third file that can be modified by any node:
mutation AddFile3 {
  addVendia_File(
    input: {
      sourceBucket: "my_bucket",
      sourceKey: "test.txt",
      sourceRegion: "us-west-2",
      destinationKey: "my-third-file.txt",
      write: ["*"]
    }
  ){
  transaction {
      transactionId
    }
  }
}
Now if you attempt to update this file from the second node, your mutation will be successful! Of course, we could also have provided an explicit list of node names instead of using “*” to indicate that only a subset of nodes have write permissions.
Do even more with files
Unis make it as easy to share files as is it to share scalar data like strings and numbers. They also give the file’s owner fine-grained access control: For each file, you can specify which other participants are able to read or update the file. By default (i.e., when you don’t provide explicit Read and Write settings), all nodes will have read access but only the file’s owning node will have write permission.
There’s even more you can do with files:
- To get a quick overview, check out our documentation on working with file types
- Read about the full set of features available, such as cache settings, in the API docs
- Download the app and start your free trial